
Everybody wants to be a YouTuber these days and the ‘why’ of this is obvious. The world today is caged in a global lockdown but people are taking this catastrophe as an opportunity to display their forever hidden talents on the global video platform, that is YouTube. According to the census of 2020, an increment of 23% was observed in the total channel count on YouTube and the total number of channels on YouTube exceeded 37 million. With nearly a billion channels on YouTube, the fight for the viewer’s attention becomes critical.
The average attention span for a viewer on YouTube is 8 seconds. This means that you, as a YouTuber, only have 8 seconds to grab the attention of the viewer towards your channel. Now the main question frequently asked is ‘How to summarize 40 mins, less or more, video in just 8 seconds?’ This is where the thumbnail of your video comes in.
What is a Video Thumbnail?
The thumbnail acts as a cover photo for your video that pictorially depicts the theme of your video in one frame. Think about it this way, the thumbnail has a similar purpose to the cover of a book. Although the saying goes ‘never judge a book by its cover’ but that is not the case here. The first thing your viewers’ eyes would land upon on your channel is the thumbnail of your video. So the thumbnail will not only act as the representative of your video but also will be accountable for your channel.
The thumbnail of your video is your weapon. It's the weapon that you can use to grab the attention of your viewers in less than 8 seconds! But you’re not the only one on YouTube who has got this weapon. You and the 37 million channels you are up against all have this weapon. So to win the attention battle, you need to come up with a wise and witty way to utilize the thumbnail.
There are multiple ways through which you can make the thumbnail of your video stand out from the rest. You can use flashy bright colors, vibrant fonts, silly emojis, or even seasonal themes to make the thumbnail of your video attractive. But is it as easy as it sounds? We’re afraid not.
The process of making a thumbnail can be quite complicated if you’re not equipped with the right tools. Choosing the right dimensions, the right colors, the right backgrounds, are things that may sound simple but actually require quite a lot of pondering.
But, as always, we have got the solution! You can use the SocialBook YouTube Builder to make your thumbnail attractive and catchy!
YouTube Thumbnail Size
The best thing about the SocialBook YouTube Builder is that it actually makes thumbnail by the exact size as mentioned in the YouTube policy. According to the YouTube policies, all custom thumbnails should have a resolution of 1280x720 with 640 pixels as the minimum width. The size of the thumbnail should be under 2MB.
SocialBook YouTube Builder
Designing the thumbnail of your video is probably even more important than designing the channel itself. This is because the thumbnail of your video is the reflection of not only your video but also of your channel.
The SocialBook YouTube Builder helps you to design a catchy and alluring thumbnail for your video. It is extremely user-friendly and easy to use. The best thing about the SocialBook YouTube Builder is that you don’t even need to install any additional heavy softwares for designing the thumbnail. All it requires is a laptop and the internet!
The SocialBook YouTube Builder liberates you from the worries of hiring some graphic designer for designing the thumbnail. Its exciting features and modern display makes the thumbnail design process extremely easy and fun for all YouTubers.
How to use the SocialBook YouTube Builder? Read on to find out!
How to use the SocialBook YouTube Builder?
There are two versions of the SocialBook Builder, one is free and the other one is paid. You can access it at SocialBook YouTube Builder.
Let’s take a look at the free version first.
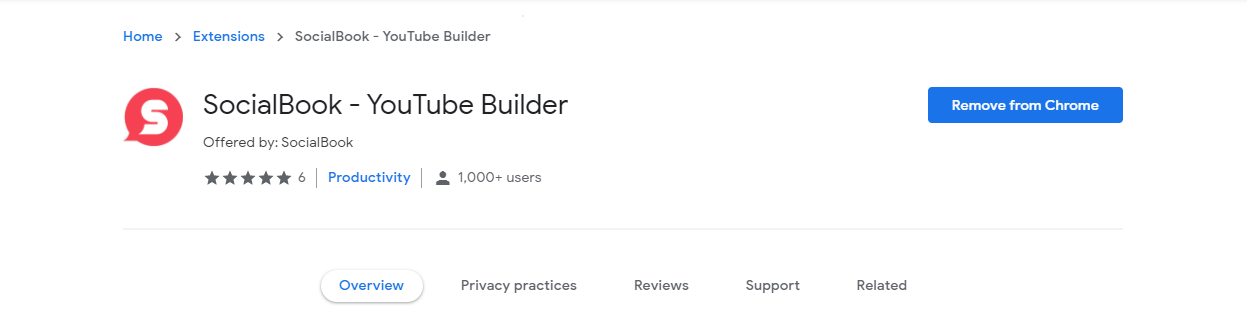
Step 1: Install the Chrome Extension
Firstly, you need to install the chrome extension available on the link we provided above. It's not really heavy and takes only a few seconds to download. Your window would look something like the below confirming that the extension has been successfully installed.
Step 2: Access the Extension
To view and use the extension that you have just installed, go down to YouTube and open your channel. The extension of the SocialBook YouTube Builder will appear on the top right of the screen. It will look something like below:
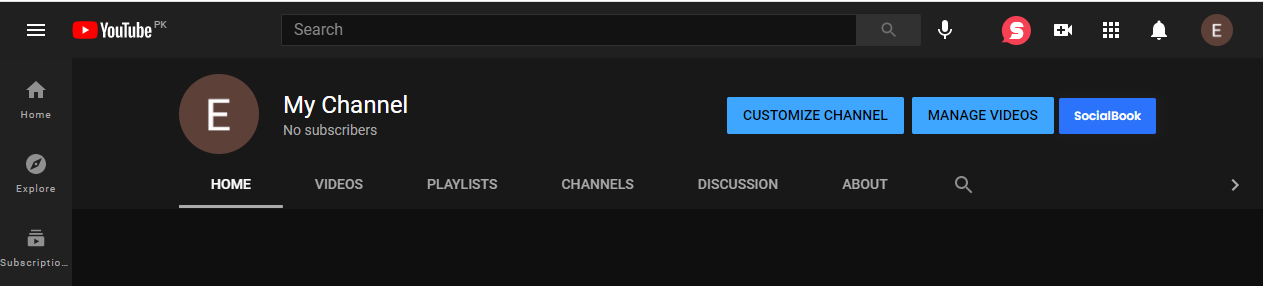
To use the SocialBook YouTube Builder, just click on the red icon. The following info box will appear. This infobox is provided by SocialBook Builder and it acts as your best friend in managing your YouTube channel.

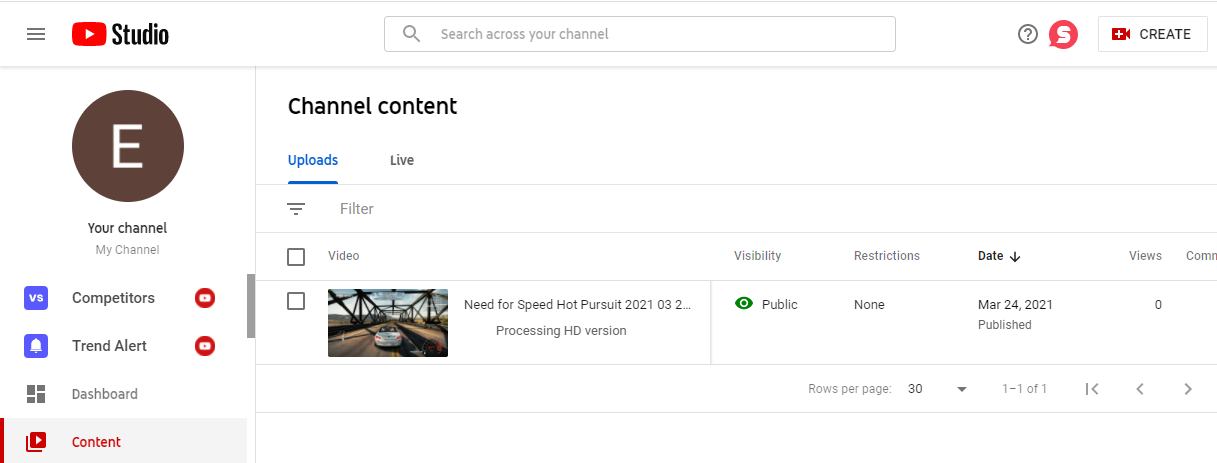
Step 3: Upload the video
Next up, you have to upload the video you want to create a thumbnail for. Since online gaming is one of the trending topics these days, so we uploaded a video regarding gaming to the channel ‘My Channel’.

After the video has been successfully uploaded, it will appear on your channel’s dashboard as shown below:

Step 4: Go to SocialBook YouTube Builder
Next up, go to the SocialBook Builder icon present on the top right of the screen and click on it. An info box will appear. Select ‘My Videos’ from the infobox templates. The following interface will appear indicating your uploaded video.
From the list of all the videos on your channel, select the one you want to create the thumbnail for. After selecting it, you will see a small pencil shaped icon indicating ‘details’. Click on it. The following interface will appear:
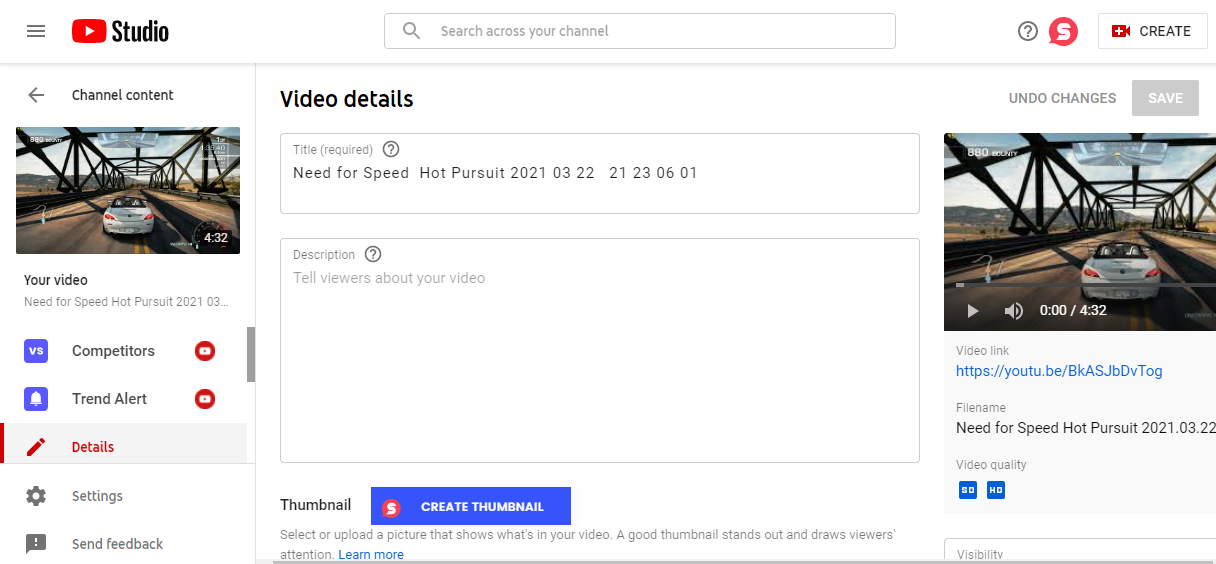
Step 5: Create Thumbnail
In the above interface, you can see an option enclosed in a blue box that says ‘Create Thumbnail’. It also has the SocialBook Builder icon included in it. Click on it. The following interface will appear:

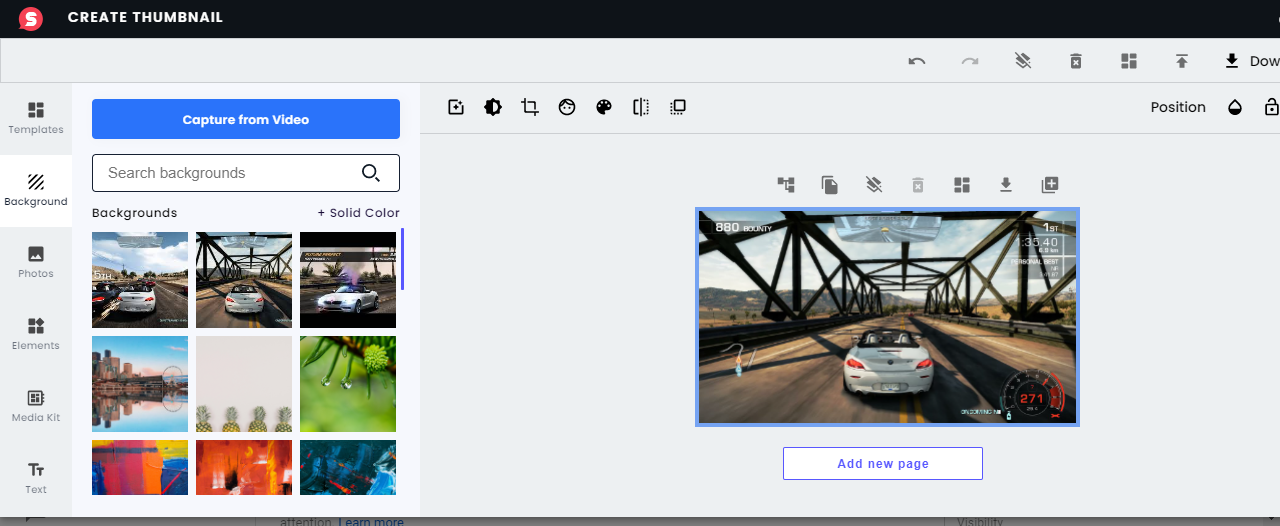
This interface acts as your blank canvas. You can choose the background of your preference and play around with it. The SocialBook YouTube Builder offers some amazing features to its users and we’ll be walking you through all those features for designing the perfect thumbnail for your video. You can also use some predefined YouTube thumbnail template from the template options for your thumbnail.
Step 6: Choose a Background
For designing the thumbnail for your video, the first thing that you will need is a background. There is a wide variety of free backgrounds that you can choose from for your video. There is also a search option that you can use to search for the background of your preference.
The video we chose is related to the renowned video game ‘Need for Speed’. The title of our video is ‘How to Always Win in Need for Speed?’ One of the backgrounds that we chose for our video from the free backgrounds of the SocialBook YouTube Builder looks something like below:
If none of the free backgrounds appeal to you, then the SocialBook Builder has got you covered in this dilemma as well! On the top left of the SocialBook Thumbnail Creator is a blue dialogue box that says ‘Capture from Video’. This feature allows you to take a snapshot from the video you uploaded and use it as a background for your thumbnail.
Step 7: Make Adjustments
The next step is to make adjustments to the background that you have selected. A bar menu will appear on the top right of your thumbnail indicating the various features that you can use to make adjustments.
The first feature is ‘Filters’. This feature opens a new layout showing the wide variety of free filters that you can use for your thumbnail. It has black and white filters, vibrant filters, gradient filters, and many more options that you can choose from. It looks something like below:

The second feature is ‘Brightness’. From this feature, you can vary the brightness and the tone of your selected background for your thumbnail. It looks something like below:

The third feature is the ‘Crop’ feature which you can use to crop your opted thumbnail and adjust it according to your preference. The fourth feature is the ‘Extract’ feature. This feature allows you to extract out any image from your opted design. The layout of this feature looks something like below:
The next feature is the ‘Animate’ feature. This feature works on cartooning your opted design. The layout for this feature looks something like the below:

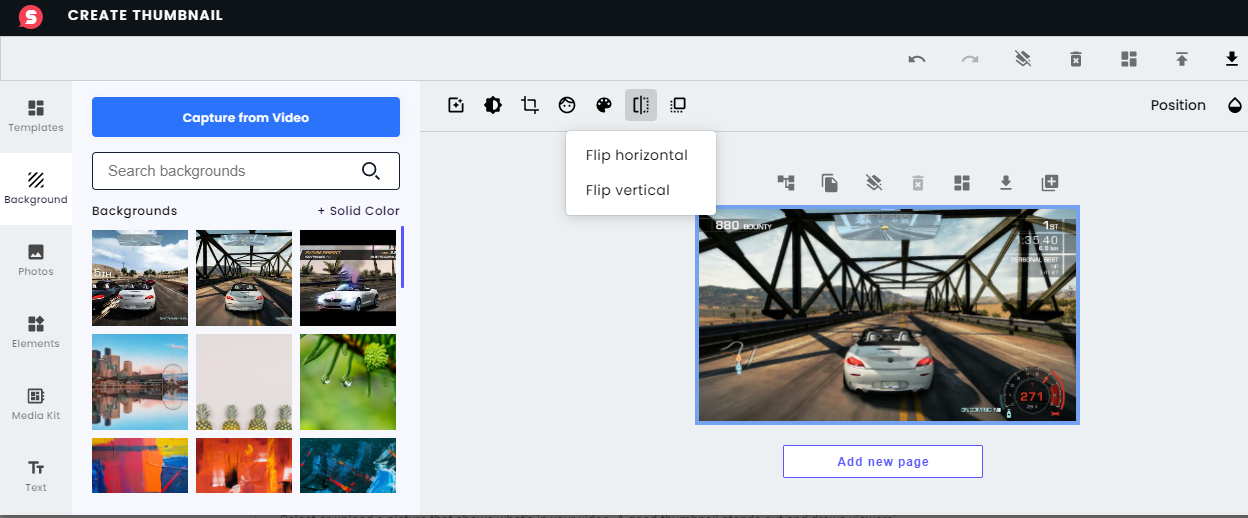
Next up is the ‘Flip’ feature that allows you to flip your opted thumbnail design.
And finally, the last feature is the ‘Adjustment’ option that enables you to make any adjustments you require for your opted design.
Step 8: Select the Right Photo
The SocialBook Builder also allows you to add some additional images to your thumbnail design. This feature of ‘Photos’ is present below the background option. Similar to the backgrounds, there is also a wide variety of free images that you can choose from to incorporate into your thumbnail. We selected the image shown below for our thumbnail:
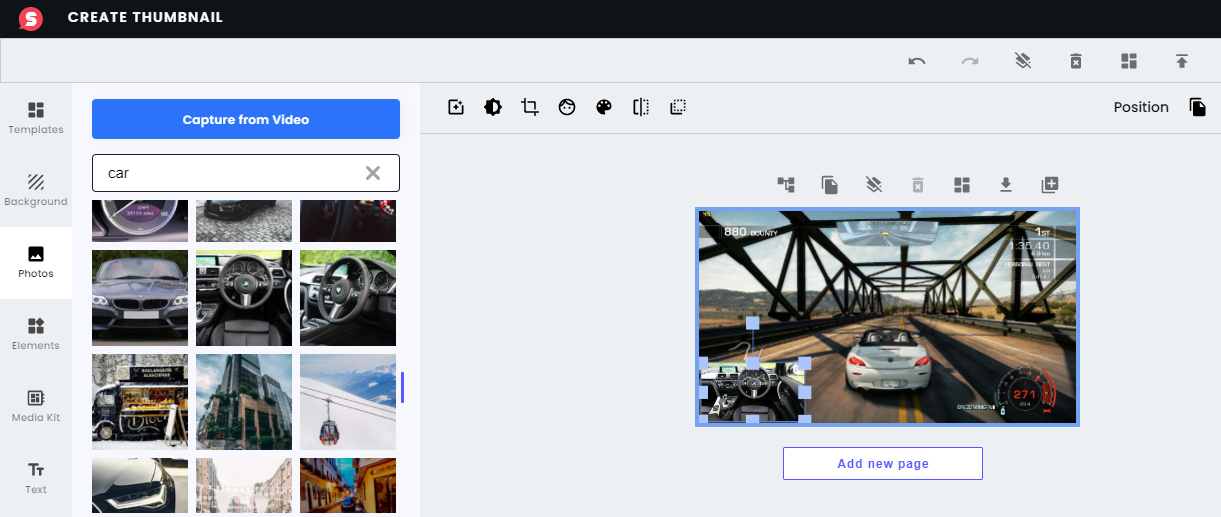
The features that we discussed above for the background can also be applied to the selected image. You can make proper adjustments to it and finalize the photo for your thumbnail.
Step 9: Choose the Right Elements
Below the photo option, SocialBook Builder also provides its users with an ‘Element’ option. There are multiple free shapes, illustrations, icons, animation, and many more elements that you choose from this feature to make your thumbnail catchy. We selected the following elements for our thumbnail design:

You can also change the color of the elements you chose from the color palette. The color palette is shown below:

Step 10: Add Text
Next and the most important step is to add the text to your thumbnail. It is advisable to have the text of your thumbnail the same as the title of your thumbnail. You can select the ‘Text’ option from the features present on the left. The text options open up a variety of text styles that you can choose from as shown below:
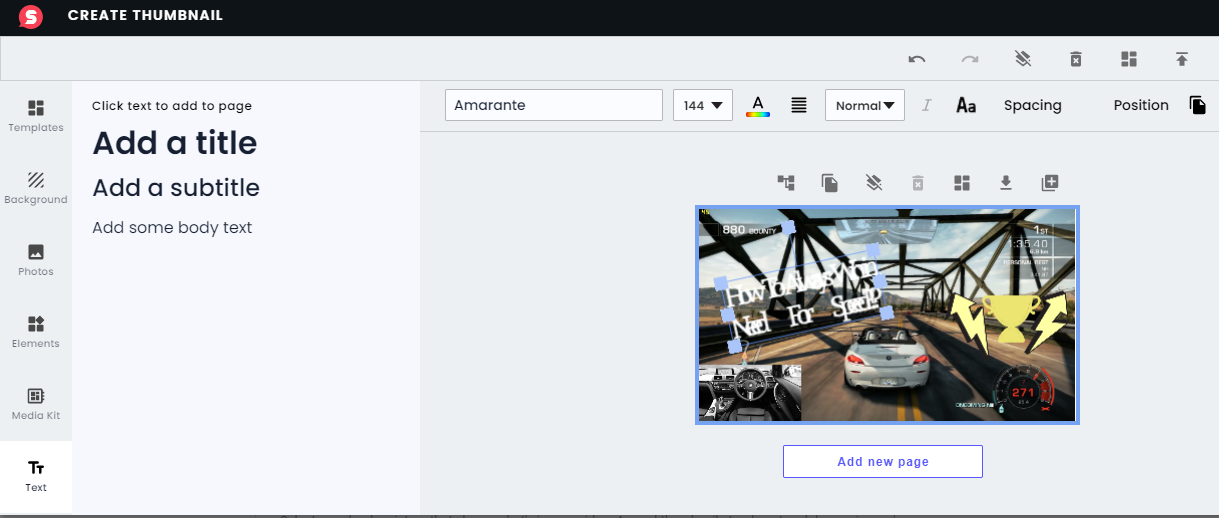
You can type in any text that you want and adjust its font according to your preference. You can change its size and color. We chose the title to be the same as the title of our video which is ‘How To Always Win In Need For Speed?!?’
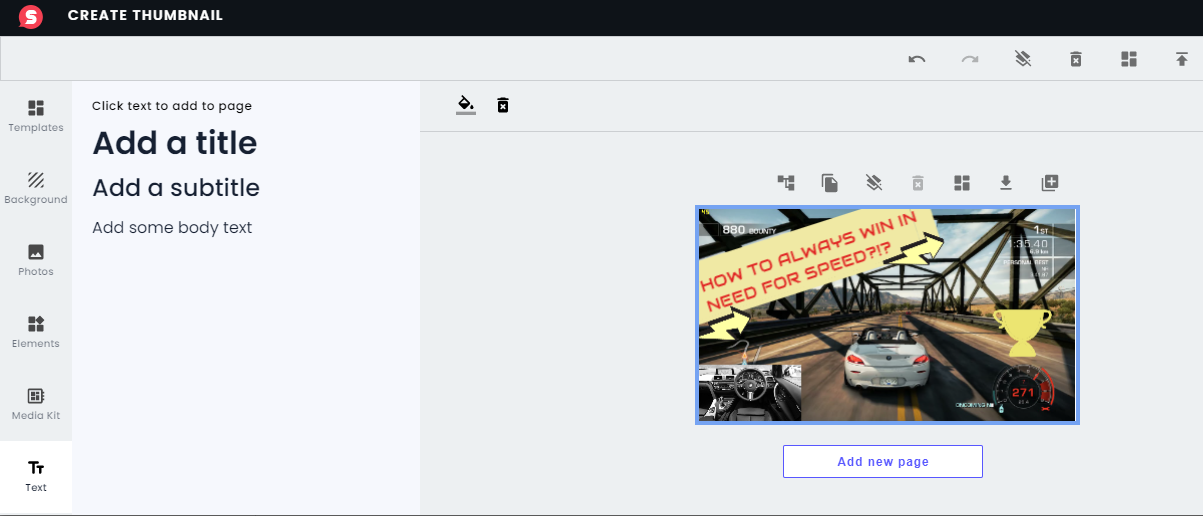
After making the desired adjustments, our title looks something like the below:
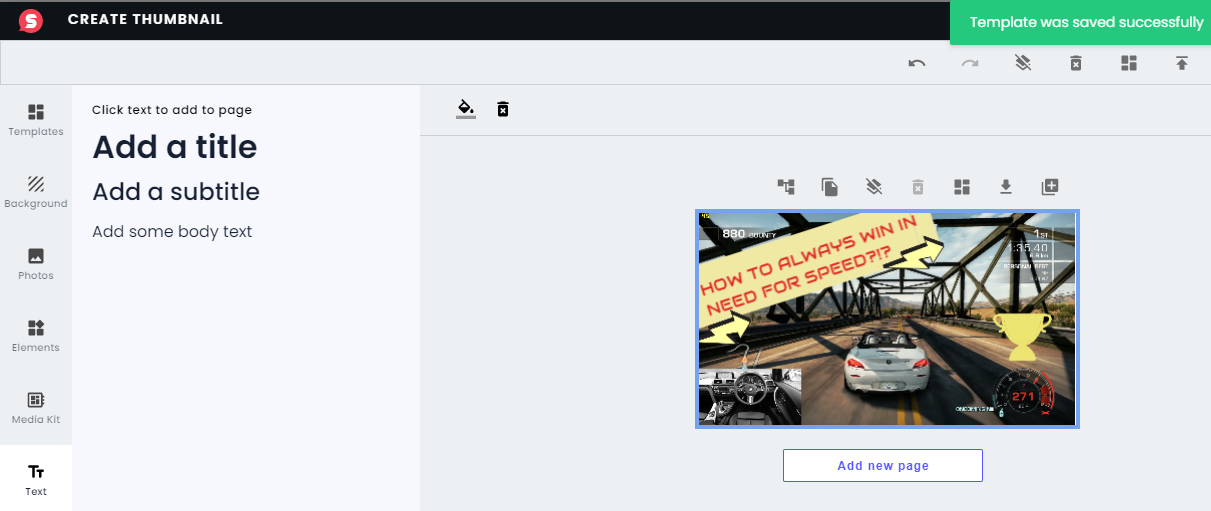
Step 11: Save the Template
The next and the almost final step is to save your designed template. For this purpose, click on the boxy icon present on the top right of the screen. This icon is shown below:

When the template has been saved, you will get a pop-up message enclosed in a green box on the top right of the screen confirming that the design of your thumbnail has been saved. In the free version of the SocialBook YouTube Builder, there is a limitation that you cannot save more than 3 designed templates. This is shown below:
Step 12: Upload the Template
The final step is to upload the template that you have designed. Next to the save icon shown above, there is an arrow icon that indicates the direct publishing of the thumbnail. You can click on it to directly upload your thumbnail for your video. Prior to uploading the thumbnail directly, make sure your SocialBook account is connected to your YouTube account. Another limitation of the free version of the SocialBook YouTube Builder is that you cannot download the thumbnail you created, for that you need to purchase the paid version of the SocialBook Builder.
Follow these steps to use our extremely convenient SocialBook YouTube Builder to create your ideal thumbnails and watch your YouTube career flourish!!