Being a content creator in the age of social media is a tough job. Sure it comes with tons of pluses and is super fun, but the struggle behind the lens is real. Hours of work, weeks of sleepless nights, and months of patience are just some necessities that a content creator needs to be equipped with. Being a content creator is all about getting more and more people to follow you every day. The bigger your follower base, the bigger your impression. The ideal goal for every influencer is to become the hot topic in the competitive market and to become the prized treasure for brands. But being an influencer is a full-time job that knows no working hours limit. You need to be on the go 24/7, no matter when and where you are!
So undoubtedly, the life of an influencer is full of happenings and frenzied moments. Under such circumstances, it is extremely important to have all your social platform links stored in one place so whenever the need arises, you will be prepared beforehand. At that moment, you would not have to worry frantically about finding the right link if all of them are stored in the right place! Not only would this help you to stay at the top of things by being super organized, but it would also create a lasting impression of your personality in the eyes of brands. Influencers are often labeled as non-professional due to the lack of organization of information at their end, so in order to defy that label, you need to stay one step ahead in the game!
This is where our free link in bio platform LinkOne comes in. SocialBook is now introducing LinkOne that can help you to stay at the top of the influencer marketing game! LinkOne allows you to organize all your social media platform links into one place. Not only it enables you to host all of your links in one place, but it also provides you with the customization features that allow you to style your Link.One website according to your personality and preference. How can you do that? Read on to find out!
Step # 1: Open SocialBook.io
The first step is getting into SocialBook. Head over to your browser and type in SocialBook.io, a sign-in portal will open up. Enter your login credentials and press sign in to open your SocialBook account. If you do not already have an account on SocialBook, then head over to the sign-up option. You can create your SocialBook account in the sign-up portal in just a few minutes by entering some simple information such as your email, password, etc.
Step # 2: Open LinkOne
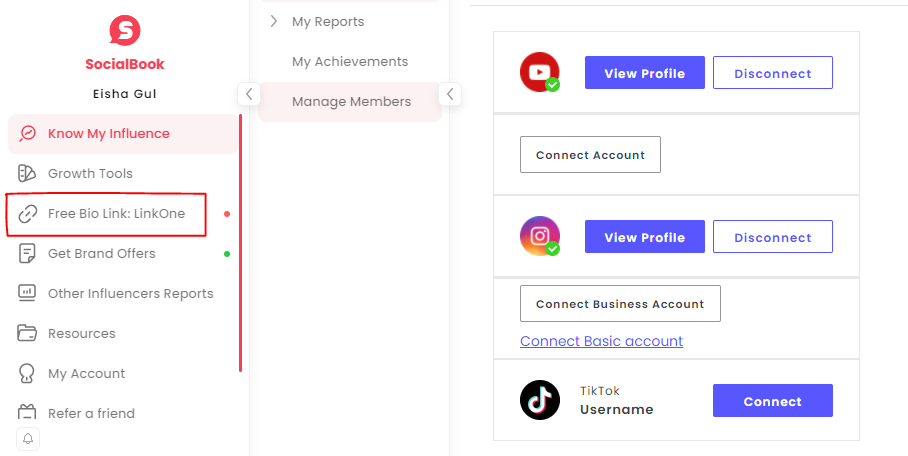
Now that you have your SocialBook account opened up, the next step is to open LinkOne. For this purpose, head over to the menu present on the left of the screen. In this menu, you will see plenty of options such as Resources, Growth Tools, etc. Navigate through this menu and open LinkOne. An image indicating this step is given below:
Step # 3: Create Your Own Website
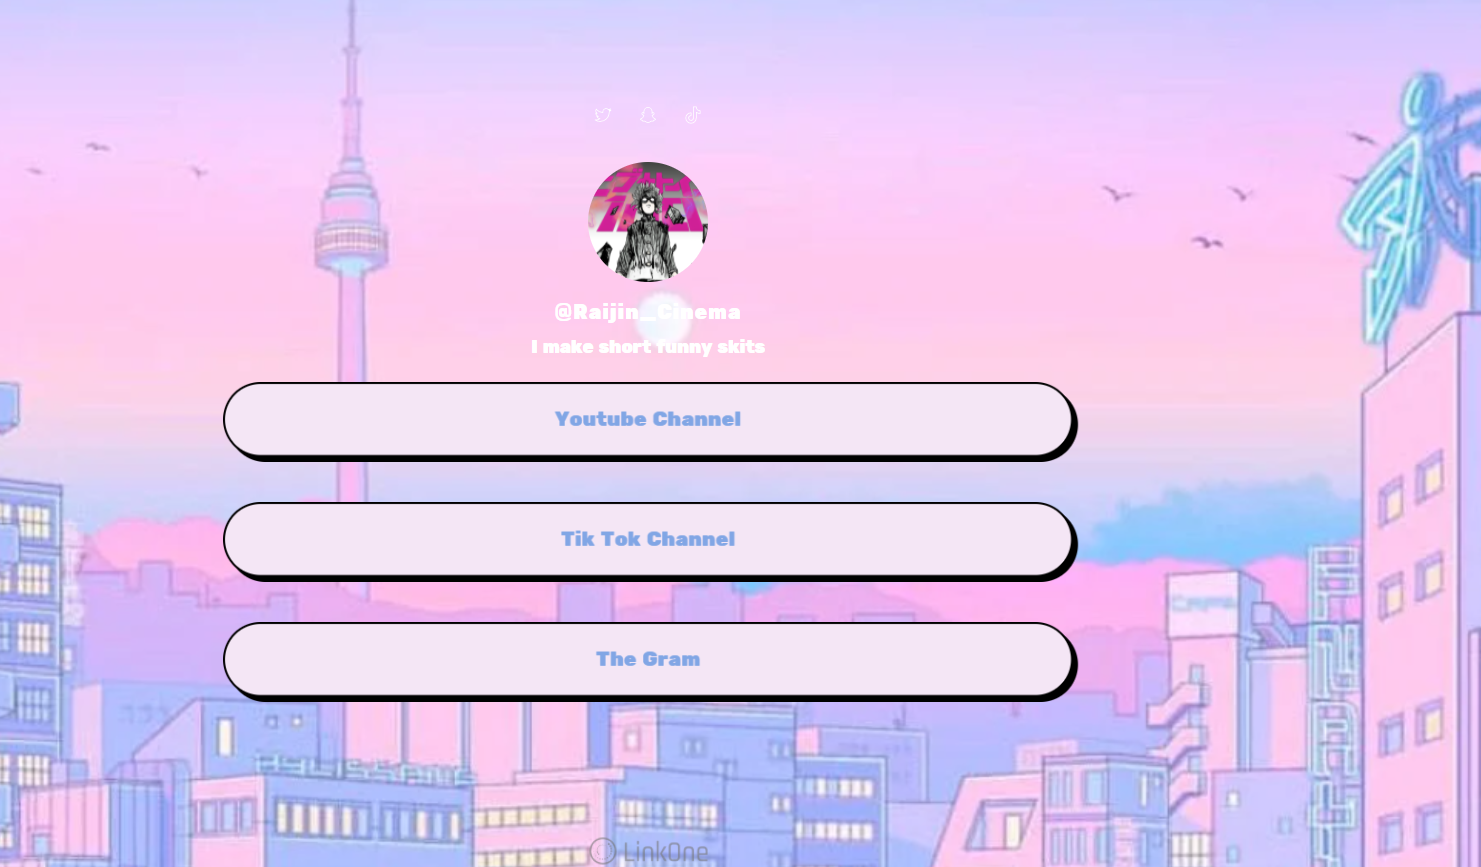
Once you will open Link.One, you will see a couple of user-friendly options that will enable you to create a website. Some of these options include an About Me section, where you will enter your personal details, and Social Media, where you will enter the links of all your social media platform. An interface of your website created through LinkOne will be simultaneously displayed on the right as shown in the image below. Whatever updates or changes you will make on your LinkOne website will be projected onto the interface so you can analyze how a regular user would perceive your website.
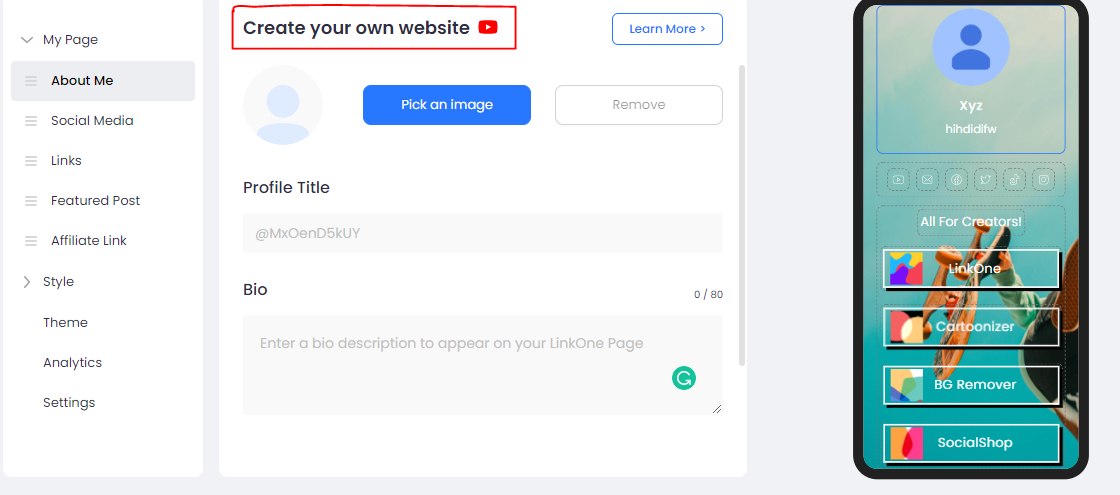
Step # 4: Enter Profile Title, Bio, and Add Profile Image
To get started with your website, you will first need to insert a profile title that would be a reflection of your website. You can choose any title of your preference, for instance, you can have your own name as the profile title or you can use your YouTube channel’s name, the choice is entirely yours.
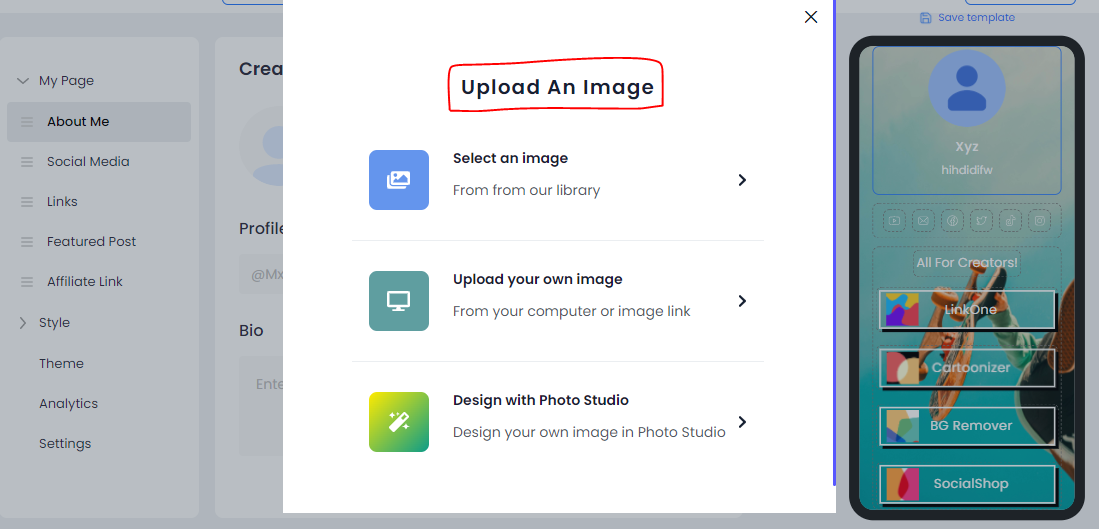
Once you have selected a Profile Title, the next thing to do is to insert a profile image. For inserting a profile image, you will get multiple options. You have the option to either use an existing image from the LinkOne gallery, upload any image of your own, or even get creative and design an image with the Photo Studio. You can change this image anytime by selecting the option ‘Remove Image’. After successfully using a profile title and uploading a profile image, the next thing to do is to write a small bio. This bio will appear on your main LinkOne page so make sure to cover all your attributes in your bio. You can keep it descriptive or casual, or in any way that you prefer! In this way, you can customize your Link.One website according to your personality.
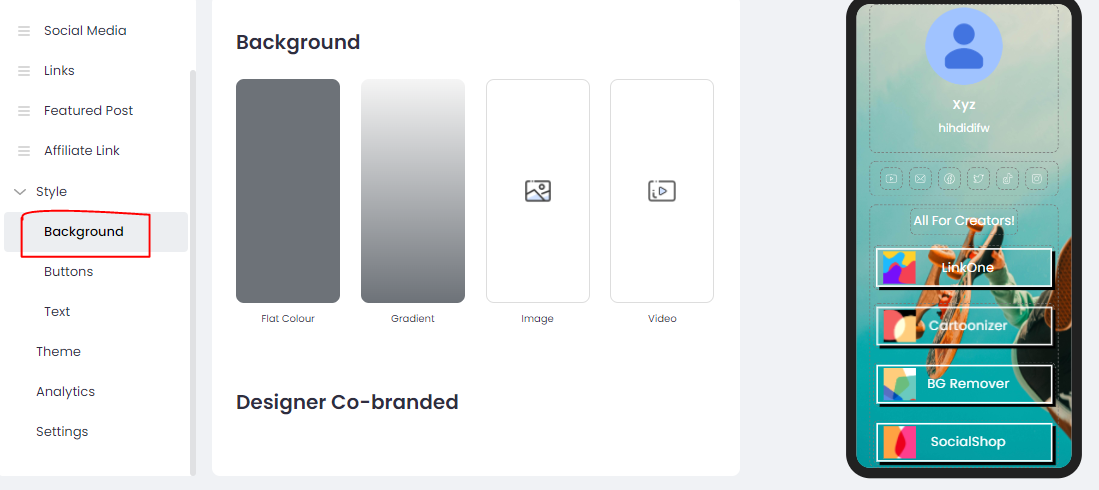
Step # 5: Set a Background
The best thing about Link.One is that you can easily customize your website according to your style without seeking any professional help! Link.One allows you to edit the background of your website according to your style. You can either choose a solid plain color as the background for your website, or a gradient effect background as well. If you want to give a little personal touch to your website, then you can also choose an image or a video as the background! The interface showing this step is given below:
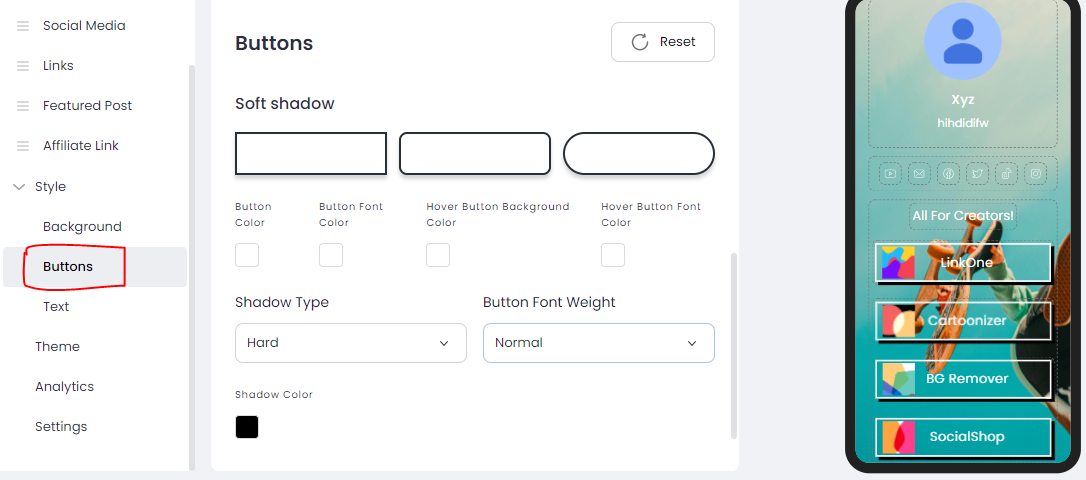
Step # 6: Choose Button Style
The key to making an attractive website is to keep it as user-friendly as possible. So for this purpose, LinkOne provides you with multiple styling options that you can apply for the buttons on your website. You can either choose plain colored buttons or even add shadow effects to the buttons. You can also choose the button font style and font weight and customize all these features according to your own dream design!
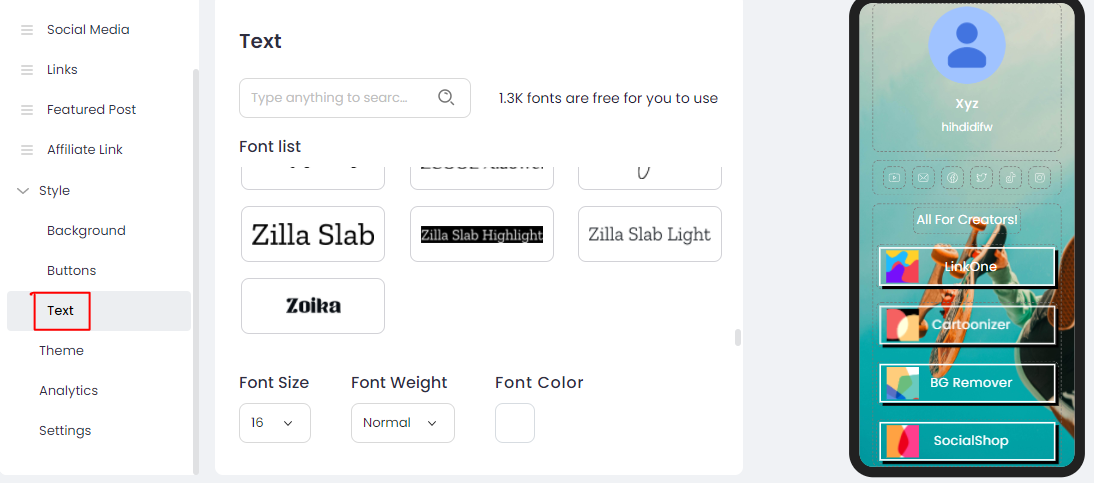
Step # 7: Choose Text Style
You can also customize the text style according to your choice. On Link.One, there are more than 1.3K font styles for you to choose from, you can select any that matches your personality! You can also update font color, font size, and font-weight. While choosing a font style, just make sure it reflects your personality and your niche!
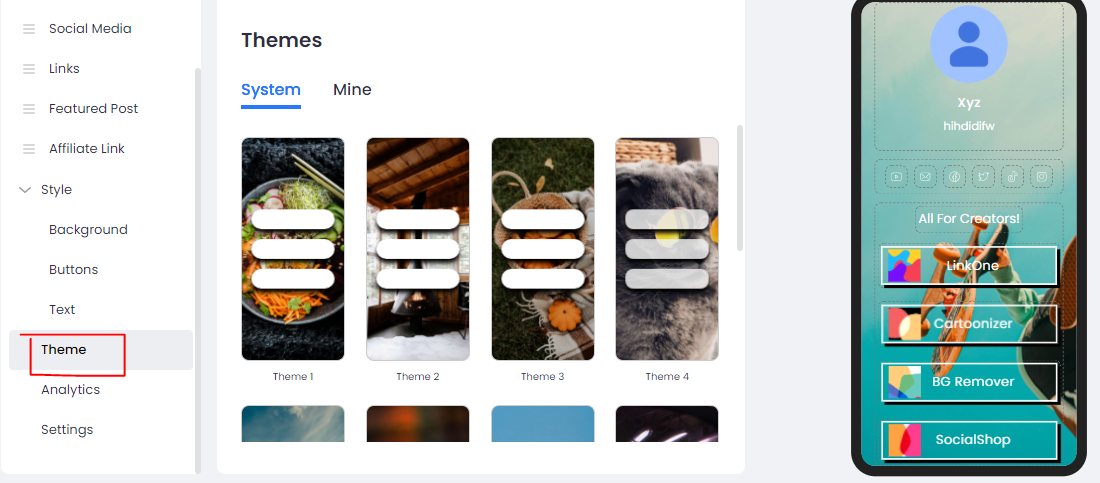
Step # 8: Select a Theme
What’s a website without a theme? To add the final touchups to your Link.One website, head over to the themes option. In the themes option, there are multiple theme designs that you can choose from. You can choose any theme that portrays your influencer career and captures your niche.
And in just simple 8 steps, you can set up your own website on SociaBook via Link.One! It's super easy and extremely convenient. We hope you found this blog helpful, stay tuned for more!
Let's get started to create your first LinkOne page!
We proudly created more FREE tools for you:
- SocialBook Video Background Remover: the tool allows you to make unlimited changes to the backgrounds of your videos without spending a single cent.
- Cartoonizer Tool: turn your photo into a cartoon avatar with one simple click.